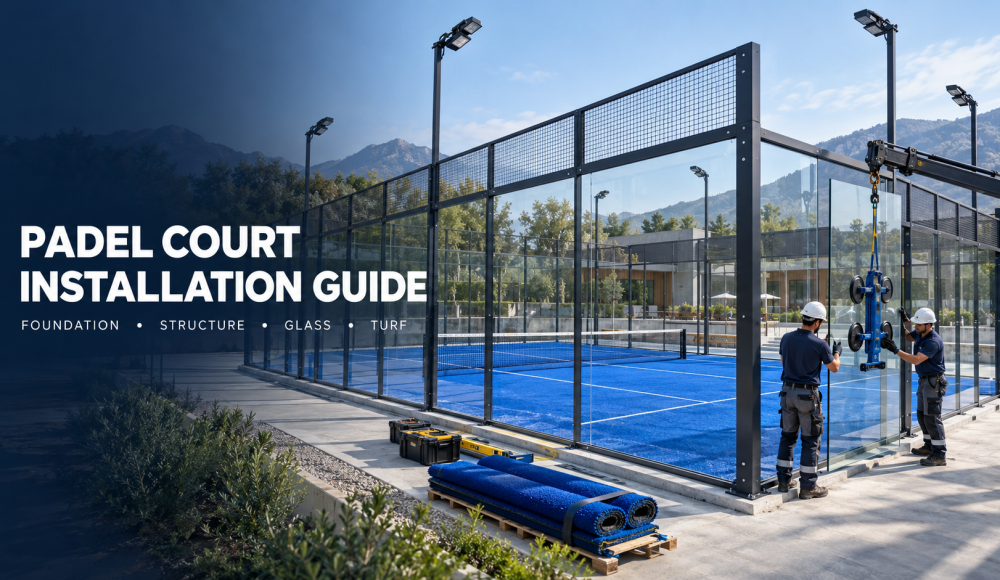
Installing a padel court involves much more than assembling steel posts, glass panels and artificial turf. The quality of the foundation, the accuracy of the court layout, the selected fixing system and the experience of the installation team all affect the court’s safety, appearance and service life.
For most projects, the most important work should be completed before the court equipment arrives. A level foundation, correct drainage slope, confirmed structural drawings and a clear installation plan can prevent expensive modifications later.
This padel court installation guide explains how to choose the right installation solution and introduces the main construction stages for a panoramic padel court.
1. Choose the Right Padel Court Installation System
The first decision is whether the project requires a fixed court, a mobile-base court or a covered court.
| Court system | Suitable applications | Main installation requirement |
|---|---|---|
| Fixed padel court | Clubs, schools, resorts and permanent sports facilities | Reinforced concrete foundation and expansion anchors |
| Mobile-base padel court | Temporary venues, leased sites and locations where drilling is restricted | Flat load-bearing surface and integrated steel base |
| Indoor padel court | Warehouses and indoor sports centers | Sufficient ceiling height and a level indoor slab |
| Outdoor padel court | Commercial clubs, hotels and community facilities | Drainage, wind resistance and corrosion protection |
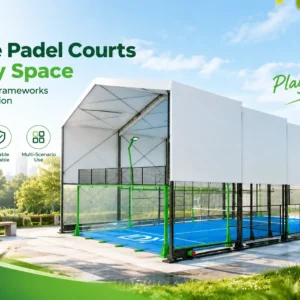
| Covered padel court | Rainy, sunny or all-weather locations | Additional roof foundation and local wind or snow load assessment |
A fixed court is normally the most stable choice for a long-term commercial project. However, a mobile padel court can be more suitable when the operator cannot drill into the existing floor or expects to relocate the court in the future.
For outdoor projects, the structural configuration should also reflect the local environment. Coastal locations may require stronger corrosion protection, while areas exposed to high winds or snow need project-specific structural calculations.
Explore LDK’s available padel court systems before selecting a configuration.
2. Confirm the Court Dimensions Before Foundation Construction
The standard internal playing area of a padel court is:
- Length: 20,000 mm
- Width: 10,000 mm
For the panoramic court covered by this installation manual, the structural positioning dimensions are approximately:
- Overall positioning length: 20,033 mm
- Overall positioning width: 10,032 mm
- Diagonal measurement: 22,404.5 mm
These structural dimensions are model-specific. Base plates, doors, lighting columns and steel profiles may differ between court designs. The contractor should therefore obtain the final CAD layout and foundation drawing from the manufacturer before pouring concrete or drilling anchor holes.
The site should also reserve additional space outside the playing area for:
- Structural base plates
- Installation equipment
- Drainage channels
- Electrical connections
- Door operation
- Cleaning and future maintenance
- Safe access around the court
Never construct the foundation using only the nominal 20 × 10 m playing dimensions.
3. Check the Foundation and Ground Conditions
A high-quality padel court cannot compensate for an uneven foundation. If the slab is not level, the steel frame may become difficult to align, glass gaps may become inconsistent and water may remain beneath the artificial turf.
According to the installation requirements, the concrete base should meet the following conditions:
Ground Level and Flatness
- Ground elevation deviation should not exceed 3 mm.
- When measured with a 3 m straightedge, the gap should be less than 3 mm.
- Depressions at any location should not exceed 3 mm.
- The surface should be waterproofed and protected against moisture.
A laser level should be used to measure the finished concrete surface. The contractor should record the height at each reference point and mark any area requiring correction.
If the surface does not meet the required tolerance, secondary leveling or a suitable self-leveling cement system may be required before court installation.
Drainage Slope
For an outdoor court, the recommended slope runs from the centerline of the 10 m side toward both sides and should not exceed 0.5%.
For an indoor court, the slope should not exceed 0.3%.
The slope must provide drainage without affecting the steel alignment or producing an uneven playing surface. Drainage design should also consider local rainfall and the discharge capacity around the court.
4. Prepare the Installation Team and Tools
A panoramic padel court contains heavy steel components and large tempered-glass panels. Installation should be completed by trained technicians or an experienced local construction team following the manufacturer’s drawings.
Typical tools include:
- Hex keys
- Adjustable spanners
- Phillips screwdrivers
- Scissors and cutting tools
- Professional glass suction cups
- Rubber mallet and hammer
- Electric drill and rotary hammer
- Stable elevated work platform
- Spirit level
- Magnetic plumb line or vertical measuring tool
- Tape measure
- Chalk line
- Air gun for cleaning drilled holes
Because the glass panels are heavy and vulnerable to edge damage, sufficient workers and professional lifting equipment should be prepared before glass installation begins.
5. Main Padel Court Installation Process
Although the exact connections vary by model, a typical panoramic padel court follows the sequence below.
Step 1: Inspect and Organize All Components
Before assembly, check the packing list and inspect the steel posts, beams, mesh panels, glass, lights, turf, fasteners and accessories.
Arrange the components according to their identification numbers. Placing the 18 glass panels inside the court area before the complete frame is enclosed can make later glass installation easier.
Damaged glass, bent steel components or missing fasteners should be reported before installation continues.
Step 2: Mark the Court Position
Use the positioning drawing, tape measure and chalk line to mark the court perimeter.
Measure both diagonals. Equal diagonals confirm that the layout is square. For the model described in the manual, the diagonal should be approximately 22,404.5 mm.
Small positioning errors at this stage can create much larger alignment problems when the final steel panels and glass are installed.
Step 3: Preassemble the Main Steel Frame
Start with the corner posts, upper beams and bottom frame beams. Continue installing the side posts and mesh panels according to the component-number drawing.
During preassembly, do not fully tighten all bolts immediately. Keeping the connections slightly loose allows the installers to adjust:
- Overall dimensions
- Frame squareness
- Column verticality
- Beam alignment
- Glass openings
- Door positions
All components should connect correctly before permanent anchor holes are drilled.
Step 4: Check Alignment and Install the Anchors
Once the complete frame has been preassembled, verify the court dimensions and check every column with a level or vertical measuring tool.
Mark the anchor positions through the base plates and drill the corresponding holes.
The supplied installation manual specifies the following anchor arrangement for this court model:
| Position | Expansion anchor | Recommended drilling diameter |
|---|---|---|
| Bottom of W3-A and W3-B | φ10 × 120 mm | 12 mm |
| Net posts | φ12 × 150 mm | 16 mm |
| Other structural posts | φ16 × 200 mm | 20 mm |
These specifications apply to the referenced court model. The final anchor selection must follow the approved project drawing, concrete strength and local structural requirements.
After drilling, remove all dust from the holes with an air gun. Insert and tighten the expansion anchors only after confirming that the frame remains square and vertical.
Step 5: Prepare the Steel Structure for Glass Installation
Before installing the glass, clean every steel surface that may contact the glass. Remove metal fragments, dirt and sharp objects.
Apply EVA single-sided cushioning tape to all steel surfaces that touch the glass. Cut the silicone or rubber strips to match the width of the bottom retaining plates and position them correctly.
These cushioning materials prevent direct glass-to-metal contact and reduce concentrated pressure on the glass edges.
Step 6: Install the Tempered Glass Panels
Use professional glass suction cups and sufficient manpower to lift each panel. Insert the glass carefully into the bottom cushioning strip and connect it to the steel structure using the specified clamps and fasteners.
During this stage:
- Keep the glass vertical.
- Protect all corners and edges from impact.
- Maintain consistent gaps between adjacent panels.
- Do not force a panel into a misaligned opening.
- Check that every glass clamp contains the correct protective pad.
- Avoid glass installation during strong winds.
The installer should correct the steel-frame alignment instead of using excessive force on the glass.
Step 7: Complete the Upper Mesh and Remaining Structure
After the main glass panels are secure, install the remaining upper mesh panels and corner connectors according to the component drawing.
Check every joint and then tighten the structural bolts progressively. Avoid fully tightening only one side of the court first, as this may pull the frame out of alignment.
Step 8: Install the Lighting Columns and LED Fixtures
Connect the lighting columns to the designated structural posts and install the LED fixtures on their brackets.
Before energizing the system, a qualified electrician should check:
- Cable routing
- Waterproof connectors
- Grounding
- Distribution box protection
- Voltage compatibility
- Light direction
- Local electrical regulations
Lighting columns and cables should not interfere with doors, glass panels or player movement.
Step 9: Install the Artificial Turf
Once the heavy structural and glass work is complete, clean the concrete base and begin installing the padel artificial turf.
The turf should be positioned, joined and fixed according to the turf installation instructions. The installer should ensure that:
- The roll direction is consistent.
- Seams are straight and secure.
- The playing lines are correctly positioned.
- No wrinkles or raised joints remain.
- The infill is distributed evenly where required.
- Drainage is not blocked.
Completing the main steel and glass work before turf installation helps protect the finished playing surface from drilling dust and equipment damage.
You can also review LDK’s professional padel artificial turf options for indoor and outdoor projects.
Step 10: Install the Net Posts and Net
The two net posts should be positioned approximately 10 m apart, with each post around 5 m from the court center point.
Install and align the posts before attaching the net. Adjust the net until it is straight and evenly tensioned without pulling the posts out of position.
6. Final Installation Inspection
Before opening the court for play, complete a full inspection.
The acceptance checklist should include:
- Internal playing area is 20 × 10 m.
- Court diagonals and structural dimensions match the drawing.
- All structural posts are vertical.
- Beams and mesh panels are correctly aligned.
- All anchors and structural bolts are tightened.
- Glass panels are free from edge damage and abnormal pressure.
- EVA tape, silicone strips and protective pads are correctly positioned.
- Doors open and close smoothly.
- Lighting and electrical systems operate correctly.
- Turf seams and playing lines are flat.
- Net posts are correctly positioned.
- The court surface drains properly.
- The installation area is free from metal fragments and construction waste.
Keep the installation drawings, component list, electrical information and maintenance instructions for future inspections and spare-parts replacement.
7. How to Choose a Padel Court Installation Service
There are three common installation arrangements.
Local Contractor Installation
A local construction team completes the installation using the manufacturer’s CAD drawings, installation manual and video guidance.
This option can reduce international travel expenses, but the contractor should have experience with steel structures and large tempered-glass panels.
Manufacturer Technical Supervision
The manufacturer provides technical guidance while the local team supplies labor, lifting equipment and construction tools.
This arrangement is suitable for a first padel project or a multi-court installation where technical mistakes could become expensive.
Turnkey Project Installation
One supplier coordinates the court structure, turf, lighting, accessories and installation.
A turnkey solution can simplify communication, but the quotation should clearly define the foundation work, transport, unloading, accommodation, electrical work and local equipment supplied by each party.
When comparing suppliers, do not evaluate only the equipment price. Request:
- Final court and foundation drawings
- Component numbering system
- Packing list
- Installation manual and videos
- Anchor and fastener specifications
- Glass installation instructions
- Electrical layout
- Spare-parts list
- Warranty terms
- Remote or on-site technical support
8. LDK Overseas Padel Court Project Experience
Shenzhen LDK Industrial Co., Ltd. has manufactured professional sports equipment since 1981 and supplies sports facility solutions to customers in more than 70 countries.
LDK’s overseas padel portfolio includes projects in Bonaire, the Dominican Republic, Malawi, Oman, the Netherlands, France, South Africa, Pakistan, Mali and Russia.
These markets represent very different installation environments. Coastal and island projects must consider wind and salt corrosion. Projects in the Middle East, South Asia and Africa require attention to heat, UV exposure and dust. European and cold-region projects may need stronger drainage, moisture protection and consideration of local snow or freeze-thaw conditions.
LDK can provide different solutions, including:
- Classic padel courts
- Panoramic padel courts
- 360-degree panoramic courts
- Reinforced outdoor courts
- Mobile-base padel courts
- Courts with integrated or independent roofs
- Artificial turf and LED lighting
- Customized colors and club logos
- CAD layouts and foundation drawings
- Installation manuals and technical guidance
Learn more about LDK’s panoramic padel courts and manufacturing experience.
Planning a Padel Court Project?
A successful installation begins with the correct site information.
To receive a suitable court configuration and quotation, send LDK the following details:
- Project country and city
- Indoor or outdoor installation
- Number of courts
- Available site dimensions
- Existing foundation drawings or site photos
- Local wind and snow load requirements
- Preferred court type and color
- Required roof, turf and lighting options
- Expected project completion date
LDK’s team can help review your site, recommend an appropriate padel court structure and provide the drawings and installation information required by your local contractor.
Contact LDK Sports to discuss your padel court project and request a customized quotation.